How to develop Angular 10 CRUD with Spring Boot REST API
-
 Chinthaka Dinadasa
 - 26 Nov, 2020

In this article, I’m going to explain how we can integrate both Angular frontend with REST API developed using Spring Boot. Additionally, I’m covering full CRUD with angular 10.
For this article, I’m going to use REST API which I’ve developed for,
You can download the source code from here for that spring boot REST API.
and the API was developed to cover basic operations inside a simple book library. So our UI will be representing the features that could communicate to REST API and handle the frontend specific aspects.
Additionally, the same API has been developed using MongoDB and DynamoDb as well,
- Spring Boot REST API Using Spring Data MongoDB Tutorial
- Spring Boot REST API CRUD With DynamoDB Tutorial
Technologies I’m going to use in Frontend,
- Angular 10.1.5
- Bootstrap 4.0
- lodash 4.17
- Angular HttpClient
topics that we are going to cover,
- Up and Running Backend REST API
- Initializing Angular Project
- Defining REST API Client with HttpClient
- Developing UI Components
- Conclusion
Final project structure for this tutorial,
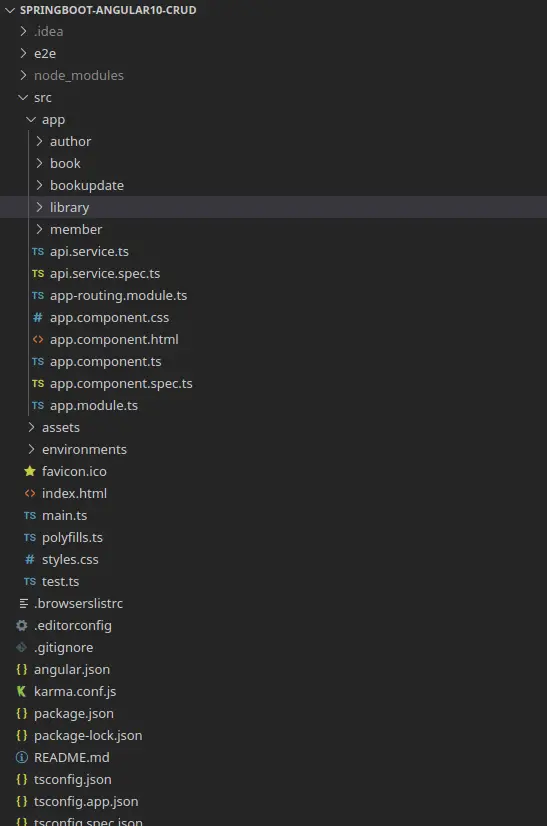
Base project structure for angular 10 application.
Up and Running Backend REST API
Here as I mentioned above, I’ll use the API we have developed in our previous tutorial, First, download the source codes for that Spring boot REST API from here.
$ git clone https://github.com/javatodev/tutorials.git .
If you are really new to Spring Boot, You can get an idea from our article on How to Create a Spring Boot Project.
After downloading the project, change the spring-boot-rest-api-mysql/src/main/resources/application.properties to connect with the preferred MySQL instance on your side.
spring.datasource.url=jdbc:mysql://127.0.0.1:3306/java_to_dev_api_mysql
spring.datasource.username=root
spring.datasource.password=password
spring.jpa.hibernate.ddl-auto=update
spring.jpa.show-sql=true
Change these properties accordingly to access the mysql instance on your machine.
Then start the application using following command,
$ ./gradlew bootRun
Then you can validate the API status just accessing following URL from your browser or using CURL in command line,
http://localhost:8080/api/library/book
It should return an empty list or list of books if data is available on your database, after correctly up and running.
$ curl http://localhost:8080/api/library/book[{"id":22,"name":"Sherlock Holmes","isbn":"48973274342343242","author":{"id":27,"firstName":"Sir Arthur","lastName":"Conan Doille"}}]
Initializing Angular Project
If you are really new to angular please refer this article to install and configure angular CLI before starting this tutorial.
Here I’m using angular CLI (10.1.5) to generate our base project for this tutorial.
First generate your project using following command and add –routing=true to same command, then it will generate our base application with all the components which necessary to have in routing enabled angular application.
$ ng new springboot-angular10-crud --routing=true
Then select the option you like in the next stages after the above command, For my sources, I’m using the following for the options, But you are free to use any option you would like.
- Which style sheet format would you like to use? – CSS
Ok, Now we have our fresh angular 10 project with routing module integrations.
Adding Additional Modules
In this tutorial, There are few more additional NPM modules I’m going to use and those are as follows,
- bootstrap 4.5.3
- bootstrap-icons – 1.1.0
- lodash – 4.17.20
How to install bootstrap with an angular application ?
Here I’m explaining how we can add a bootstrap module into the angular project and add few additional configurations to configure it correctly.
First, navigate inside project’s root folder:
$ npm install --save bootstrap bootstrap-icons jquery
This will install the bootstrap and jquery module inside your angular project with the latest versions. In my case I’ve got “bootstrap”: “^4.5.3″,bootstrap-icons:”^1.1.0” and “jquery”: “^3.5.1”.
Finally open the angular.json from your project root and add following into the styles and scripts section,
"styles": [
    "node_modules/bootstrap/dist/css/bootstrap.min.css",
    "src/styles.css"
  ],
  "scripts": [
    "node_modules/jquery/dist/jquery.min.js",
    "node_modules/bootstrap/dist/js/bootstrap.min.js"
  ]
All done now we have successfully added the bootstrap module and configured it inside our application.
Then we should configure bootstrap icons into the angular project, Basically, we are setting icons folder inside node-modules to refer as an image which is stored inside an assets folder in the angular project,
Change assets area inside angular.json as below,
"assets": [
    "src/favicon.ico",
    "src/assets",
    {
      "glob": "*.svg",
      "input": "./node_modules/bootstrap-icons/icons/",
      "output": "/assets/img/"
    }
  ]
Forms Modules in to the Angular Project
In this tutorial I’m going to use both FormsModule and ReactiveFormsModule, Hence import and setup those before proceeding,
So go to the app.module.ts and add following imports into that file,
import { FormsModule, ReactiveFormsModule } from '@angular/forms';
Then change NgModule to import those modules into the project as below,
@NgModule({
  declarations: [
    AppComponent,
    AuthorComponent,
    BookComponent,
    LibraryComponent,
    BookupdateComponent,
    MemberComponent
  ],
  imports: [
    BrowserModule,
    AppRoutingModule,
    BrowserAnimationsModule,
    FormsModule,
    ReactiveFormsModule,
    HttpClientModule
  ],
  providers: [],
  bootstrap: [AppComponent]
})
Run the Angular JS Project
You can use the following command to run the angular JS project,
$ ng serve
Then application should be available on http://localhost:4200/ by default.
Defining REST API Client with HttpClient
Here we have multiple API endpoints which we need to communicate in this article. Those are,
| Endpoint | HTTP Method | Description |
|---|---|---|
| /api/library/book | GET | Read all books from database. |
| /api/library/book?isbn=1919 | GET | Read book by ISBN |
| ****/api/library/book/:id | GET | Read book by ID |
| ****/api/library/book | POST | Register New Book |
| ****/api/library/book/:id | DELETE | Remove a book |
| ****/api/library/book/lend | POST | Lend a book to a member |
| ****/api/library/book/:id | PATCH | Update a book |
| ****/api/library/member | POST | Register member |
| ****/api/library/member | GET | Read all members. |
| ****/api/library/member/:id | PATCH | Update a member |
| /api/library/author | GET | Read all authors |
| /api/library/author | POST | Create author |
So we needs to have a API client which we could use to communicate with our API. So lets add our API service in to the angular app and define all the methods which build communication layer inside angular application.
use following command to generate a new service,
$ ng generate service api
Then this will create service api.service.ts inside the src folder of our angular application.
After that add constructor param to inject HttpClient to our API service class like below,
constructor(private apiClient : HttpClient) {}
add all the methods and change api service as below,
import { Injectable } from '@angular/core';
import { Observable } from 'rxjs';
import { HttpClient } from '@angular/common/http';

const apiBaseUrl = "http://localhost:8080/api/library"

@Injectable({
  providedIn: 'root'
})
export class ApiService {


  constructor(private apiClient : HttpClient) {}

  getAllAuthors(): Observable<any> {
    return this.apiClient.get(apiBaseUrl+'/author');
  }

  createAuthor(data): Observable<any> {
    console.log(data);
    return this.apiClient.post(apiBaseUrl+'/author', data);
  }

  createBook(book): Observable<any> {
    return this.apiClient.post(apiBaseUrl+'/book', book);
  }

  readBooks(): Observable<any> {
    return this.apiClient.get(apiBaseUrl+'/book');
  }

  readBook(bookId): Observable<any> {
    return this.apiClient.get(`${apiBaseUrl}/book/${bookId}`);
  }

  removeBook(bookId) : Observable<any> {
    return this.apiClient.delete(`${apiBaseUrl}/book/${bookId}`);
  }

  createAMember(member) : Observable<any> {
    return this.apiClient.post(apiBaseUrl+"/member", member);
  }

  lendABook(lend) : Observable<any> {
    return this.apiClient.post(apiBaseUrl+"/book/lend", lend);
  }

  updateBook(bookId, updateData): Observable<any> {
    return this.apiClient.patch(`${apiBaseUrl}/book/${bookId}`, updateData);
  }

  getMembers(): Observable<any>  {
    return this.apiClient.get(apiBaseUrl+'/member');
  }

}
Here I’m using constant to set base API URL of our REST API and use that with concatenating other parts in request URL when we needs.
Ok now we have our API client which have functional implementation to communicate with our REST API.
Developing UI Components
Use following command to generate few components which we need to have in this tutorial,
$ ng generate component author
$ ng generate component book
$ ng generate component bookupdate
$ ng generate component library
$ ng generate component member
All these commands will create a separate folder for each component inside src/app folder.
eg: for author there will be a folder with following files
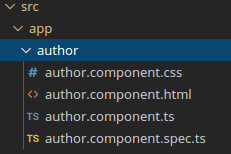
Author component generated using angular CLI
Defining Routing and Main Menu
Then we should define the routes to access those components we generated above,
we can define those routes with adding following changes into the routes in the src/app/app-routing.module.ts.
import { AuthorComponent } from './author/author.component';
import { BookComponent } from './book/book.component';
import { LibraryComponent } from './library/library.component';
import { BookupdateComponent } from './bookupdate/bookupdate.component';
import { MemberComponent } from './member/member.component';

const routes: Routes = [
  {path: '', component: LibraryComponent},
  {path: 'author', component: AuthorComponent},
  {path: 'book', component: BookComponent},
  {path: 'library', component: LibraryComponent},
  {path: 'book/:id', component: BookupdateComponent},
  {path: 'member', component: MemberComponent}
];
Then let’s define the header with main menu and place the router-outlet to load components inside the application.
Just add following into the src/app/app.component.html this is the main UI component which is loaded initially with the angular application.
<div class="container">
  <hr />
  <ul class="nav nav-pills nav-justified">
    <li class="nav-item">
      <a class="nav-link" href="/">
        <img src="/assets/img/house.svg" alt="" width="32" height="32" title="Bootstrap" />
      </a>
    </li>
    <li class="nav-item">
      <a class="nav-link" href="/library">Library</a>
    </li>
    <li class="nav-item">
      <a class="nav-link" href="/author">Author</a>
    </li>
    <li class="nav-item">
      <a class="nav-link" href="/book">Book</a>
    </li>
    <li class="nav-item">
      <a class="nav-link" href="/member">Member</a>
    </li>
  </ul>
  <hr/>
  <router-outlet></router-outlet>
</div>
the above change will reflect in our UI as below,
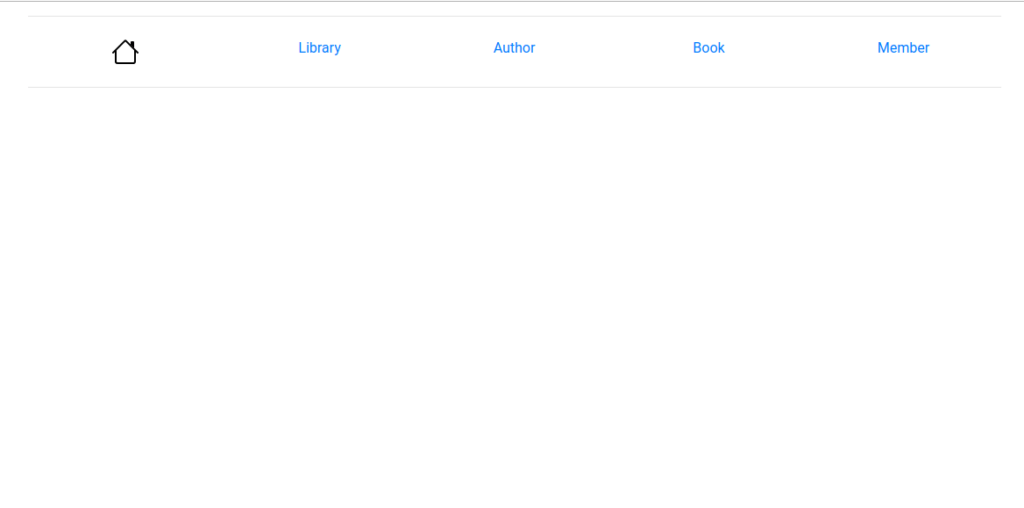
Main Dashboard UI without components
So when we click on these menu items it will load the component which we defined for that URL in the routing file into the
Author Registration UI Component
This is a simple UI with 2 inputs to save Author with first name and last name, and additionally, It has a separate area to show registered authors inside the application.
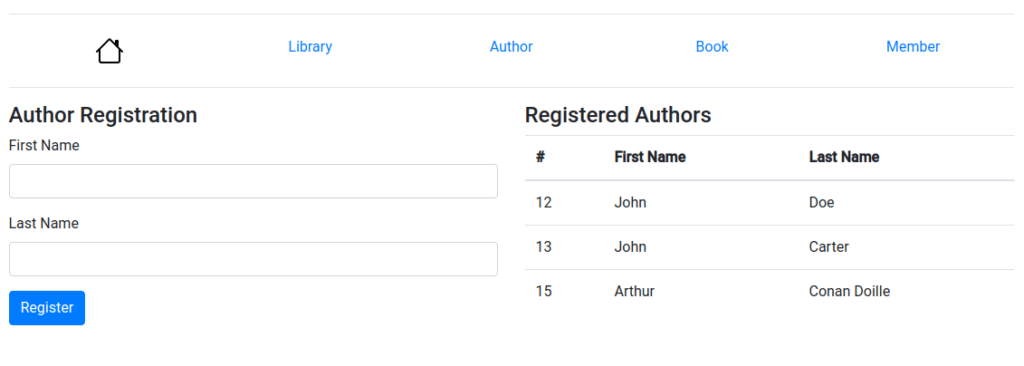
Author Registration UI
In this UI we need to have two methods that allow us to register author and read all the registered authors from API.
Registering Author
In this part we are going to use form with inputs and capture those after form submission.
In angular we have FormBuilder from ‘@angular/forms’ to do the form implementaion with angular UI.
First we should inject form builder using constructor, and here I’m adding api service which we developed earlier too.
Open the author.component.ts and add following into that file,
import { FormBuilder, } from '@angular/forms';
import { ApiService } from '../api.service';

constructor(
    private formBuilder: FormBuilder,
    private apiService: ApiService)
Then we should implement our registration form using form builder.
authorRegistrationForm;

  constructor(
    private formBuilder: FormBuilder,
    private apiService: ApiService) {

    this.authorRegistrationForm = this.formBuilder.group({
      firstname: '',
      lastname: ''
    });

  }
Here we are setting two parameters to bring UI data, and those are first name and last name.
Then we should add the method which we need to have in order to handle the form submission.
onSubmit(authorData) {
    this.authorRegistrationForm.reset();
    const user_register_data = {
      firstName: authorData.firstname,
      lastName: authorData.lastname
    };
    console.log('Your author registration successfully', authorData);
    this.apiService.createAuthor(user_register_data).subscribe(response=>{
      console.log("Author creation successfull"+ response.id);
      this.getAuthors();
    },error=>{
      console.log('Error in author registration');
    });

  }
So after the user submits the form, the data will be captured using that authorData parameter, and then I’m adding this user_register_data custom parameter because our API needs to have a first name and last name as firstName and lastName. So what we are getting from our form will be added into a custom object and pass it to the API.
After that we need to subscribe to that API call, then angular will wait until the response coming from the API and then process the parts which need to do after the API response.
Now we are ready with our form implementation in the component. Let’s add the changes to the UI or else the HTML in order to handle this form and send the submission.
open your author.component.html, and add the following form code inside that,
<div class="col-md-6">
    <h4>Author Registration</h4>
    <form [formGroup]="authorRegistrationForm" (ngSubmit)="onSubmit(authorRegistrationForm.value)">
      <div class="form-group">
        <label for="author_f_name">First Name</label>
        <input
          type="text"
          class="form-control"
          id="author_f_name"
          formControlName="firstname"
        />
      </div>
      <div class="form-group">
        <label for="author_l_name">Last Name</label>
        <input
          type="text"
          class="form-control"
          id="author_l_name"
          formControlName="lastname"
        />
      </div>
      <button type="submit" class="btn btn-primary">Register</button>
    </form>
  </div>
Now we are ready with registering authors, Just run the app with following command and try to register a author with any first name and password.
$ ng serve
Loading Registered Users
Now our UI has ability to save any author, Then we need to have a way of reading all the registered authors from API and show it in a table.
First add the method we needs to have in order to read all registered authors from API.
authors;

getAuthors() {
    this.apiService.getAllAuthors().subscribe(response=>{
      this.authors = response;
      console.log(JSON.stringify(response));
    },
    error=>{
      console.log(error)
    })
  }
Here I’m reading all the registered authors and bind those values into the authors variable. Then we could easily use this author variable in the frontend.
Additionally, we need to load these registered authors while loading the view. Hence we can use ngOnInit() method to setup things should happen while loading the page.
So basically we can call the getAuthors() method from ngOnInit().
ngOnInit(): void {
    this.getAuthors();
  }
Then we can use these methods in the html side and load registered authors in the UI.
Add following html snippet into the author.component.html.
<div class="col-md-6">
    <h4>Registered Authors</h4>
    <table class="table">
        <thead>
          <tr>
            <th scope="col">#</th>
            <th scope="col">First Name</th>
            <th scope="col">Last Name</th>
          </tr>
        </thead>
        <tbody>
          <tr *ngFor="let author of authors">
              <td>{{author.id}}</td>
              <td>{{author.firstName}}</td>
              <td>{{author.lastName}}</td>
            </tr>
        </tbody>
      </table>
  </div>
Here I’m looping the author’s data set coming from the backend and add a row for each author which comes from the backend on this table view. we can use *ngFor to loop list data in angular JS.
Now our Author Registration UI is done with API integration.
Full code for author.component.ts
<div class="row">
  <div class="col-md-6">
    <h4>Author Registration</h4>
    <form [formGroup]="authorRegistrationForm" (ngSubmit)="onSubmit(authorRegistrationForm.value)">
      <div class="form-group">
        <label for="author_f_name">First Name</label>
        <input
          type="text"
          class="form-control"
          id="author_f_name"
          formControlName="firstname"
        />
      </div>
      <div class="form-group">
        <label for="author_l_name">Last Name</label>
        <input
          type="text"
          class="form-control"
          id="author_l_name"
          formControlName="lastname"
        />
      </div>
      <button type="submit" class="btn btn-primary">Register</button>
    </form>
  </div>
  <div class="col-md-6">
    <h4>Registered Authors</h4>
    <table class="table">
        <thead>
          <tr>
            <th scope="col">#</th>
            <th scope="col">First Name</th>
            <th scope="col">Last Name</th>
          </tr>
        </thead>
        <tbody>
          <tr *ngFor="let author of authors">
              <td>{{author.id}}</td>
              <td>{{author.firstName}}</td>
              <td>{{author.lastName}}</td>
            </tr>
        </tbody>
      </table>
  </div>
</div>
author.component.ts
import { Component, OnInit } from '@angular/core';
import { FormBuilder, } from '@angular/forms';
import { ApiService } from '../api.service';

@Component({
  selector: 'app-author',
  templateUrl: './author.component.html',
  styleUrls: ['./author.component.css'],
})
export class AuthorComponent implements OnInit {

  authors;
  authorRegistrationForm;

  constructor(
    private formBuilder: FormBuilder,
    private apiService: ApiService) {

    this.authorRegistrationForm = this.formBuilder.group({
      firstname: '',
      lastname: ''
    });

  }

  ngOnInit(): void {
    this.getAuthors();
  }

  getAuthors() {
    this.apiService.getAllAuthors().subscribe(response=>{
      this.authors = response;
      console.log(JSON.stringify(response));
    },
    error=>{
      console.log(error)
    })
  }

  onSubmit(authorData) {
    this.authorRegistrationForm.reset();
    const user_register_data = {
      firstName: authorData.firstname,
      lastName: authorData.lastname
    };
    console.log('Your author registration successfully', authorData);
    this.apiService.createAuthor(user_register_data).subscribe(response=>{
      console.log("Author creation successfull"+ response.id);
      this.getAuthors();
    },error=>{
      console.log('Error in author registration');
    });

  }

}
Book Registration UI Component
In this UI I will explain how we can register a new book, edit and delete a book functions.
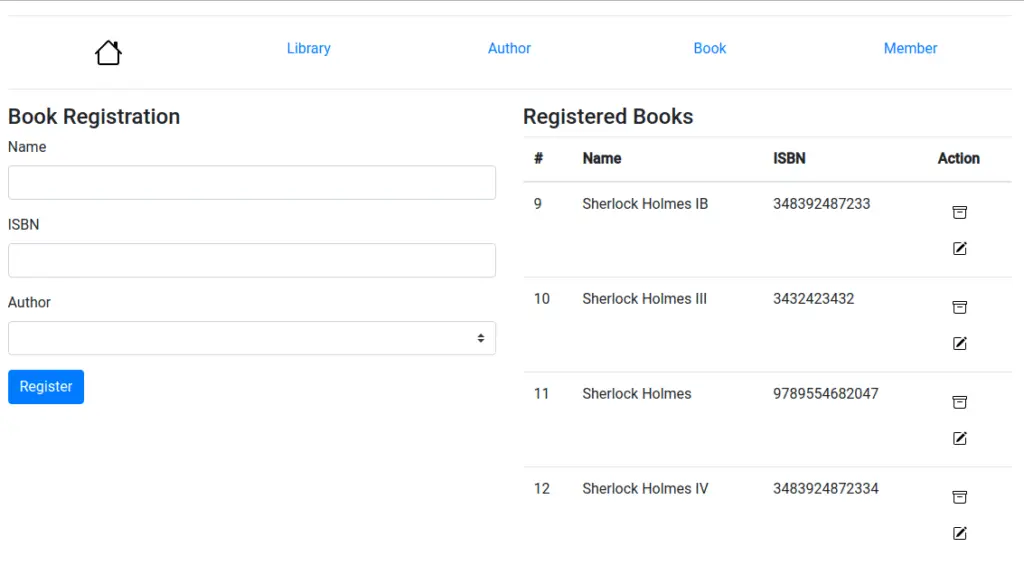
Register a Book UI component
In this UI registering and loading registered books are the same as the previous step of registering authors.
Hence I’m not going to explain it again.
Here I’ve implemented two more functionalities with Editing and Deleting registered book. Let’s see how we could implement those functions.
Delete a Registered Book
In this case I’m using book ID and pass it to the DELETE API in order to delete the book. In that case first we need to implement a method which could capture incoming ID and send it to the DELETE API.
Add following delete method in to the book.component.ts.
deleteBook(bookId) {
    console.log("Deleting book ", bookId);
    this.apiService.removeBook(bookId).subscribe(response=>{
      console.log("Book deletion success"+response)
      this.getBooks();
      this.deletionStatus = true;
    });

  }
Now we need to pass correct book id from the HTML side,
In this case, I’m setting the book id from the iterated book list to the deleteBook method in the frontend using (click).
<tr *ngFor="let book of books">
                <td>{{book.id}}</td>
                <td>{{book.name}}</td>
                <td>{{book.isbn}}</td>
                <td>
                <a class="nav-link" (click)="deleteBook(book.id)">
                    <img src="/assets/img/archive.svg" alt="" width="16" height="16" title="Bootstrap" />
                  </a>
                </td>
              </tr>
So this will add custom delete button with icon into every row in book table.
Editing a Registered Book
In here I’m using a separate view (bookupdate) to show saved book details, and then allows me to edit those details from that view.
Additionally to load this view we should have the correct book ID and load book data on clicking edit button in the book registration view.
So we can pass the book ID using the URL as below
/book/:book_id
So how we can capture these path parameters in angular?
In that case we can use ActivatedRoute from angular router. First import ActivatedRoute in to the bookupdate.component.ts.
import { ActivatedRoute } from '@angular/router';
Then add the constructor param to inject ActivatedRoute.
constructor(private route: ActivatedRoute) {
}
Then on ngOnInit add the following code line to capture the incoming URL parameter. and pass it to the API service read book by id method.
ngOnInit(): void {
    this.bookId = this.route.snapshot.paramMap.get('id');
    this.apiService.readBook(this.bookId).subscribe((response) => {
      console.log('Response from Core ' + JSON.stringify(response));
      this.updateBookForm.patchValue({
        name: response.name,
        isbn: response.isbn,
        authorId: response.author.id,
        id: response.id,
      });
    });
    this.getAuthors();
  }
Here we are using a separate form and we need to set values before the update. so we can use form.patchValue to set whatever the values coming from the API and set them into the form while loading the view.
Full source code for book.component.html,
<div class="row">
    <div class="col-md-6">
      <div *ngIf="deletionStatus" class="alert alert-success" role="alert">
        Book Deletion Successfully Completed.
      </div>
      <h4>Book Registration</h4>
      <form [formGroup]="registerBookForm" (ngSubmit)="onSubmit(registerBookForm.value)">
        <div class="form-group">
          <label for="name">Name</label>
          <input
            type="text"
            class="form-control"
            id="name"
            formControlName="name"
          />
        </div>
        <div class="form-group">
          <label for="isbn">ISBN</label>
          <input
            type="text"
            class="form-control"
            id="isbn"
            formControlName="isbn"
          />
        </div>
        <div class="form-group">
          <label for="author">Author</label>
          <select class="custom-select" formControlName="authorId">
            <option *ngFor="let author of authors" [value]="author.id">
              {{author.firstName}} {{author.lastName}}
            </option>
          </select>
        </div>

        <button type="submit" class="btn btn-primary">Register</button>
      </form>
    </div>
    <div class="col-md-6">
      <h4>Registered Books</h4>
      <table class="table">
          <thead>
            <tr>
              <th scope="col">#</th>
              <th scope="col">Name</th>
              <th scope="col">ISBN</th>
              <th scope="col">Action</th>
            </tr>
          </thead>
          <tbody>
            <tr *ngFor="let book of books">
                <td>{{book.id}}</td>
                <td>{{book.name}}</td>
                <td>{{book.isbn}}</td>
                <td>
                <a class="nav-link" (click)="deleteBook(book.id)">
                    <img src="/assets/img/archive.svg" alt="" width="16" height="16" title="Bootstrap" />
                  </a>
                  <a class="nav-link" href="/book/{{book.id}}">
                    <img src="/assets/img/pencil-square.svg" alt="" width="16" height="16" title="Bootstrap" />
                  </a>
                </td>
              </tr>
          </tbody>
        </table>
    </div>
  </div>
book.component.ts
import { Component, OnInit } from '@angular/core';
import { FormBuilder } from '@angular/forms';
import { ApiService } from '../api.service';

@Component({
  selector: 'app-book',
  templateUrl: './book.component.html',
  styleUrls: ['./book.component.css'],
})
export class BookComponent implements OnInit {
  books;
  authors;
  registerBookForm;
  deletionStatus;

  constructor(
    private formBuilder: FormBuilder,
    private apiService: ApiService
  ) {
    this.registerBookForm = this.formBuilder.group({
      name: '',
      isbn: '',
      authorId: '',
    });
  }

  ngOnInit(): void {
    this.getAuthors();
    this.getBooks();
  }


  getAuthors() {
    this.apiService.getAllAuthors().subscribe(response=>{
      this.authors = response;
      console.log(JSON.stringify(response));
    },
    error=>{
      console.log(error)
    })
  }

  onSubmit(bookData) {
    this.registerBookForm.reset();
    this.apiService.createBook(bookData).subscribe(response=>{
      console.log("Book creation successfull"+ response.id);
      this.getBooks();
      console.log('Your book registration successfully', bookData);
    },error=>{
      console.log('Error in book registration');
    });

  }


  getBooks() {
    this.apiService.readBooks().subscribe(response=>{
      this.books = response;
      console.log(JSON.stringify(response));
    },
    error=>{
      console.log(error)
    })
  }

  deleteBook(bookId) {
    console.log("Deleting book ", bookId);
    this.apiService.removeBook(bookId).subscribe(response=>{
      console.log("Book deletion success"+response)
      this.getBooks();
      this.deletionStatus = true;
    });

  }

}
bookupdate.component.html
<div class="row">
    <div class="col-md-6">
        <div *ngIf="updateSuccess" class="alert alert-success" role="alert">
            Book Update Successfully Completed.
          </div>
      <h4>Book Update</h4>
      <form [formGroup]="updateBookForm" (ngSubmit)="onSubmit(updateBookForm.value)">
        <div class="form-group">
            <label for="name">Name</label>
            <input
              type="text"
              class="form-control"
              id="name"
              formControlName="name"
            />
        </div>
        <div class="form-group">
          <label for="isbn">ISBN</label>
          <input
            type="text"
            class="form-control"
            id="isbn"
            formControlName="isbn"
          />
        </div>
        <div class="form-group">
            <label for="author">Author</label>
            <select class="custom-select" formControlName="authorId">
              <option *ngFor="let author of authors" [value]="author.id">
                {{author.firstName}} {{author.lastName}}
              </option>
            </select>
          </div>
        <button type="submit" class="btn btn-primary">Update</button>
      </form>
  </div>
bookupdate.component.ts
import { Component, OnInit } from '@angular/core';
import { ActivatedRoute } from '@angular/router';
import { ApiService } from '../api.service';
import { FormBuilder } from '@angular/forms';

@Component({
  selector: 'app-bookupdate',
  templateUrl: './bookupdate.component.html',
  styleUrls: ['./bookupdate.component.css'],
})
export class BookupdateComponent implements OnInit {
  bookId;
  updateBookForm;
  authors;
  updateSuccess;

  constructor(
    private route: ActivatedRoute,
    private formBuilder: FormBuilder,
    private apiService: ApiService
  ) {
    this.updateBookForm = this.formBuilder.group({
      name: '',
      isbn: '',
      authorId: '',
      id: '',
    });
  }

  ngOnInit(): void {
    this.bookId = this.route.snapshot.paramMap.get('id');
    this.apiService.readBook(this.bookId).subscribe((response) => {
      console.log('Response from Core ' + JSON.stringify(response));
      this.updateBookForm.patchValue({
        name: response.name,
        isbn: response.isbn,
        authorId: response.author.id,
        id: response.id,
      });
    });
    this.getAuthors();
  }

  getAuthors() {
    this.apiService.getAllAuthors().subscribe(
      (response) => {
        this.authors = response;
        console.log(JSON.stringify(response));
      },
      (error) => {
        console.log(error);
      }
    );
  }

  onSubmit(updateData) {
    console.log(updateData);
    this.apiService
      .updateBook(updateData.id, updateData)
      .subscribe((response) => {
        console.log('Update book done' + response);
        this.updateSuccess = true;
      }, error=>{
        this.updateSuccess = false;
      });
  }
}
Register Member UI Component
This is same like previous author registration window, only difference is the names in the UI and the API call we needs to make in order to register a member, Hence I’m not going to explain it again in here.
member.component.html,
<div class="row">
    <div class="col-md-6">
      <h4>Member Registration</h4>
      <form [formGroup]="memberRegistrationForm" (ngSubmit)="onSubmit(memberRegistrationForm.value)">
        <div class="form-group">
          <label for="member_f_name">First Name</label>
          <input
            type="text"
            class="form-control"
            id="member_f_name"
            formControlName="firstName"
          />
        </div>
        <div class="form-group">
          <label for="member_l_name">Last Name</label>
          <input
            type="text"
            class="form-control"
            id="member_l_name"
            formControlName="lastName"
          />
        </div>
        <button type="submit" class="btn btn-primary">Register</button>
      </form>
    </div>
    <div class="col-md-6">
      <h4>Registered Members</h4>
      <table class="table">
          <thead>
            <tr>
              <th scope="col">#</th>
              <th scope="col">First Name</th>
              <th scope="col">Last Name</th>
            </tr>
          </thead>
          <tbody>
            <tr *ngFor="let member of members">
                <td>{{member.id}}</td>
                <td>{{member.firstName}}</td>
                <td>{{member.lastName}}</td>
              </tr>
          </tbody>
        </table>
    </div>
  </div>
member.component.ts
import { Component, OnInit } from '@angular/core';
import { ApiService } from '../api.service';
import { FormBuilder } from '@angular/forms';

@Component({
  selector: 'app-member',
  templateUrl: './member.component.html',
  styleUrls: ['./member.component.css']
})
export class MemberComponent implements OnInit {

  members;
  memberRegistrationForm;

  constructor(private formBuilder: FormBuilder,
    private apiService: ApiService) {
      this.memberRegistrationForm = this.formBuilder.group({
        firstName: '',
        lastName: ''
      });
    }

  ngOnInit(): void {
    this.getMembers();
  }
  getMembers() {
    this.apiService.getMembers().subscribe(response=>{
      this.members = response;
      console.log(JSON.stringify(response));
    },
    error=>{
      console.log(error)
    })
  }

  onSubmit(memberData) {
    this.memberRegistrationForm.reset();
    console.log('Your author registration successfully', memberData);
    this.apiService.createAMember(memberData).subscribe(response=>{
      console.log("Author creation successfull"+ response.id);
      this.getMembers();
    },error=>{
      console.log('Error in author registration');
    });

  }

}
Library Main Window UI Component
In this UI it allows a user to lend books to any member who is registered with the library. So basically it allows to choose a member and choose whatever the books he needs to burrow from the library.
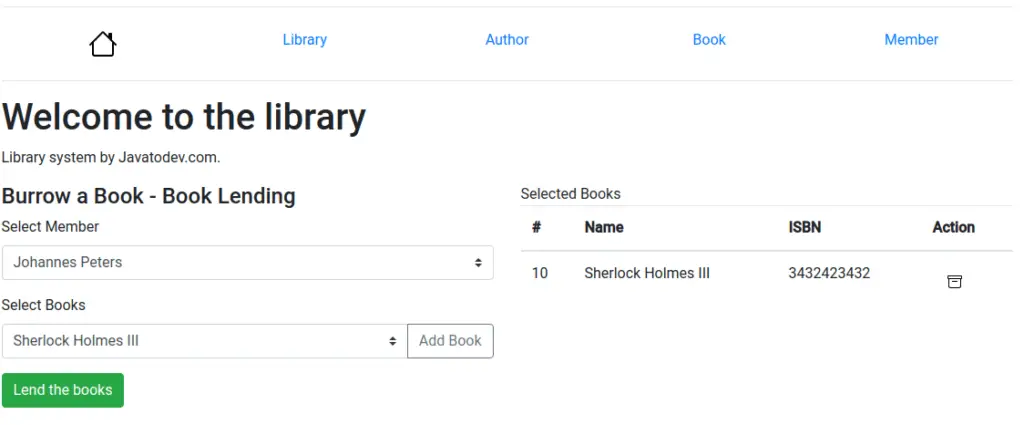
Library View UI Component
In this case we could not submit a Form and capture those data from backend, Because there are few things that we needs to dynamically set while using the UI.
So here i’m going to use template driven approch and set dynamic values to the typescript side without submitting the form.
Here we needs to maintain a list with selected books. So I’m using [(ngModel)]=”selectedBook” and pass the selected book object in to the typescript side.
<select id="book_selection" class="custom-select" [(ngModel)]="selectedBook">
  <option *ngFor="let book of books" [ngValue]="book">{{ book.name }}</option>
</select>
So from the typescript side, I could capture the whole book object using this selectedBook model,
Then we can add those selected books into a list and finally with the Lend the Books button press we can read all the selected values in that list and send those in to the API with member ID.
Additionally Here I’m using lodash library which allows us to handle collections inside js projects easily
As a example here is the removal part I developed to remove book from selected books list.
import _ from 'lodash';

removeBook(bookData) {
    _.remove(this.selectedBooks, function(data){
      return data.id == bookData
    })
  }
So here in remove method we should introduce the collection and inside the function we define the logic to capture correct element to remove from that collection.
library.component.ts
import { Component, OnInit } from '@angular/core';
import { ApiService } from '../api.service';
import _ from 'lodash';

@Component({
  selector: 'app-library',
  templateUrl: './library.component.html',
  styleUrls: ['./library.component.css']
})
export class LibraryComponent implements OnInit {

  members;
  books;
  selectedBooks;
  selectedMember;
  selectedBook;
  lendingStatus;

  constructor(private apiService:ApiService) {
    }

  ngOnInit(): void {
    this.getMembers();
    this.getBooks();
    this.selectedBooks=[];
  }
  getBooks() {
    this.apiService.readBooks().subscribe(response=>{
      this.books = response;
      console.log(JSON.stringify(response));
    },
    error=>{
      console.log(error)
    })
  }

  getMembers() {
    this.apiService.getMembers().subscribe(response=>{
      this.members = response;
      console.log(JSON.stringify(response));
    },
    error=>{
      console.log(error)
    })
  }

  addBook() {
    console.log("Selected Member : "+this.selectedMember);
    console.log("Adding a Book : "+this.selectedBook.id);
    this.selectedBooks.push(this.selectedBook);
  }

  removeBook(bookData) {
    _.remove(this.selectedBooks, function(data){
      return data.id == bookData
    })
  }

  lend() {
    console.log("Initiating book lending");

    if (!_.isEmpty(this.selectedBooks)) {

      let selectedIds = []
      this.selectedBooks.forEach(book => {
        selectedIds.push(book.id);
      });

      const book_lending_request = {
        bookIds: selectedIds,
        memberId: this.selectedMember
      };

      console.log('Your lending request', book_lending_request);

      this.apiService.lendABook(book_lending_request).subscribe(response => {
        this.lendingStatus = true;
        console.log("Lending Response : "+response);
        this.selectedBooks=[];
        this.selectedMember='';
        this.selectedBook='';
      });
    }
  }

}
library.component.html
<div class="row">
  <div class="col-md-12">
    <div *ngIf="lendingStatus" class="alert alert-success" role="alert">
      Book lending request successfully completed
    </div>
    <h1>Welcome to the library</h1>
    <p>Library system by Javatodev.com.</p>
  </div>
  <hr />
  <div class="col-md-6">
    <h4>Burrow a Book - Book Lending</h4>
    <div class="form-group">
      <div class="form-group">
        <label for="author">Select Member</label>
        <select class="custom-select" [(ngModel)]="selectedMember">
          <option *ngFor="let member of members" [value]="member.id">
            {{ member.firstName }} {{ member.lastName }}
          </option>
        </select>
      </div>
    </div>
    <div class="form-group">
      <label for="author">Select Books</label>
      <div class="input-group">
        <select
          id="book_selection"
          class="custom-select"
          [(ngModel)]="selectedBook"
        >
          <option *ngFor="let book of books" [ngValue]="book">
            {{ book.name }}
          </option>
        </select>
        <div class="input-group-append">
          <button
            class="btn btn-outline-secondary"
            type="button"
            (click)="addBook()"
          >
            Add Book
          </button>
        </div>
      </div>
    </div>

    <button class="btn btn-success" (click)="lend()">Lend the books</button>
  </div>
  <div class="col-md-6">
    Selected Books
    <table class="table">
      <thead>
        <tr>
          <th scope="col">#</th>
          <th scope="col">Name</th>
          <th scope="col">ISBN</th>
          <th scope="col">Action</th>
        </tr>
      </thead>
      <tbody>
        <tr *ngFor="let book of selectedBooks">
          <td>{{book.id}}</td>
          <td>{{book.name}}</td>
          <td>{{book.isbn}}</td>
          <td>
            <a class="nav-link" (click)="removeBook(book.id)">
              <img
                src="/assets/img/archive.svg"
                alt=""
                width="16"
                height="16"
                title="Bootstrap"
              />
            </a>
          </td>
        </tr>
      </tbody>
    </table>
  </div>
</div>
All done now our frontend angular CRUD application is ready to communicate with spring boot REST API.
Conclusion
All done, Now I hope you have a good understanding of how to develop an angular js frontend with REST API developed using Spring Boot. Comment on your ideas or issues you are facing while developing your Spring boot API.
You can find source codes for this tutorial from our Github.