How To Handle Multiple Message Properties In Spring Boot
-
 Chinthaka Dinadasa
 - 01 Feb, 2021

In this tutorial, I’m going to explain how we can use multiple message properties files in a spring boot application. We can use this approach when we need to differentiate message properties into multiple files.
Just think you have a requirement of keeping messages error messages, and API responses in different message property files. We can use the following approach to keep errors and API responses in different files.
Technologies Going to Use,
- Java 1.8
- Spring Boot: 2.3.4.RELEASE
- Lombok
- Gradle
- Intellij Idea for IDE
Create Spring Boot Application
Here I’m using spring initializr to generate a spring boot project with all the dependencies I need for this tutorial. If you are really new to Spring Boot, Please follow our article on How to Create a Spring Boot Project.
Here I’ve selected following dependencies to create spring boot project using spring initilizr,
- Spring Web – contains common web-specific utilities for both Servlet and Portlet environments.
- Lombok – The coolest plugin to spicing up your java. Never write another getter or equals method again, with one annotation your class has a fully-featured builder, Automate your logging variables, and much more.
If you need to learn how we can use Lombok in spring boot follow our article Guide to use Lombok In Spring Boot.
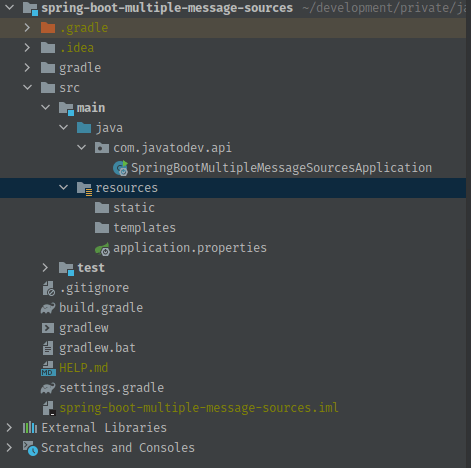
Spring Boot Default Project For Multiple Message Sources File Project
Adding Message Properties Into The Spring Boot Project
Here I’m creating 2 message property files in resources, to keep errors and api responses. In order to do that, just create two files in src/main/resources/messages folder with naming as below,
- api_error_messages.properties
- api_response_messages.properties
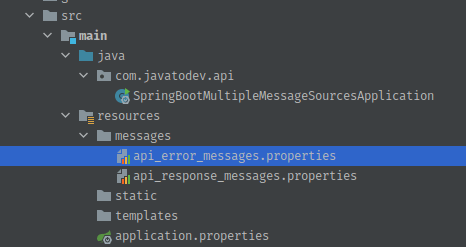
Multiple message properties in a spring boot application
Then add following message key and value pairs into those files,
- api_error_messages.properties,
api.error.user.not.found=Requested User Not Found In Registry. Please check and retry
api.error.user.already.registered=Username already registered. Please use different username and retry.
- api_response_messages.properties
api.response.user.creation.successful=User registered successfully inside the application.
api.response.user.update.successful=User update request successfully applied.
Setup MessageSources Bean With Introducing Multiple Message Properties
Now we have our error message and API response property files inside the project. Let’s introduce those files to the Spring Boot application using message source bean.
Here I’m using a separate @Configuration class to set up this MessageSource bean, You can use the same approach or use the already available configuration class to define this MessageSource Bean.
package com.javatodev.api.config;

import org.springframework.context.MessageSource;
import org.springframework.context.annotation.Bean;
import org.springframework.context.annotation.Configuration;
import org.springframework.context.support.ReloadableResourceBundleMessageSource;

@Configuration
public class AppConfiguration {

    @Bean
    public MessageSource messageSource() {
        ReloadableResourceBundleMessageSource messageSource
                = new ReloadableResourceBundleMessageSource();
        messageSource.setBasenames(
                "classpath:/messages/api_error_messages",
                "classpath:/messages/api_response_messages"
        );
        messageSource.setDefaultEncoding("UTF-8");
        return messageSource;
    }

}
Now we can access these message properties inside our application anywhere we need. Here I’ll demonstrate it with @PostConstruct method in Main Class,
package com.javatodev.api;

import lombok.RequiredArgsConstructor;
import org.springframework.boot.SpringApplication;
import org.springframework.boot.autoconfigure.SpringBootApplication;
import org.springframework.context.MessageSource;

import javax.annotation.PostConstruct;
import java.util.Locale;

@SpringBootApplication
@RequiredArgsConstructor
public class SpringBootMultipleMessageSourcesApplication {

    private final MessageSource messageSource;

    public static void main(String[] args) {
        SpringApplication.run(SpringBootMultipleMessageSourcesApplication.class, args);
    }

    @PostConstruct
    public void postConstruct() {
        System.out.println("Running Message Property Data");
        System.out.println(messageSource.getMessage("api.error.user.not.found", null, Locale.ENGLISH));
        System.out.println(messageSource.getMessage("api.error.user.already.registered", null, Locale.ENGLISH));
        System.out.println(messageSource.getMessage("api.response.user.creation.successful", null, Locale.ENGLISH));
        System.out.println(messageSource.getMessage("api.response.user.update.successful", null, Locale.ENGLISH));
        System.out.println("End Message Property Data");
    }

}
Start the application and output should be look like below.
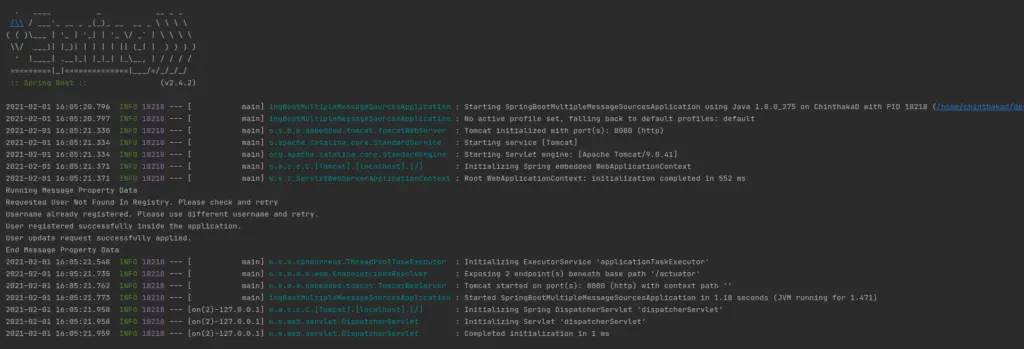
Multiple Message Properties in Spring Boot Output
Conclusion
Thanks for reading our latest article on How To Handle Multiple Message Properties In Spring Boot with practical usage.
If you are looking for spring boot based practical application development tutorials, just check our article series and comment on whatever new things you need to see on our website.
You can get the source code for this tutorial from our GitHub repository.